

Wood rot often starts in a place no one thinks to check, such as beneath a stair tread, behind siding, or near a slow roof leak. Timely repair can stop that hidden damage from spreading into framing, trim, decks, and other parts of a building.
Why Dry Rot and Wood Rot Repair Matters
Knowing what to watch for gives boards and property managers a much better chance of fixing the problem while it is still manageable.
Wood is used throughout many properties. It may be found in decks, balconies, siding, window frames, roof structures, fences, stairs, railings, and decorative trim. When moisture reaches these materials and remains there, fungi can begin breaking down the wood.
The damage may seem cosmetic at first. Paint peels, a board changes color, or a railing feels slightly soft. Yet the visible area may be only one part of the problem, especially if water has entered a wall, roof, or floor assembly.
Prompt dry rot and wood rot repair helps protect the building and the association’s budget. It may also reduce safety concerns, prevent resident complaints, and keep a small maintenance issue from becoming a large capital project.
Understanding Dry Rot and Wood Rot
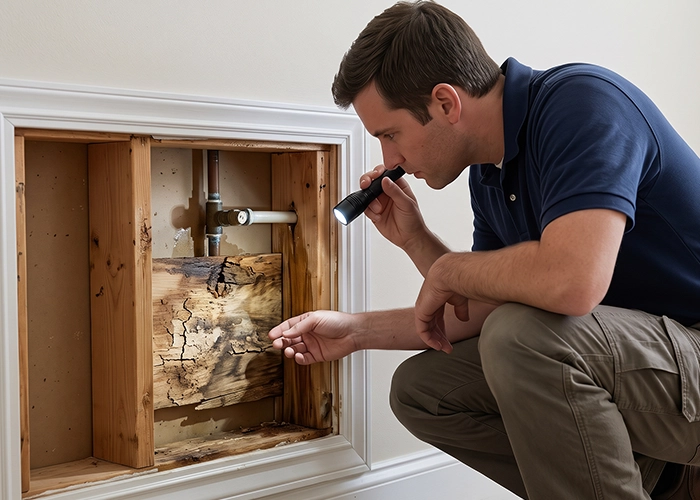
Wood rot is decay caused by fungi that feed on parts of the wood. These fungi need enough moisture, a suitable temperature, oxygen, and time to grow. Remove the moisture, and one of the main conditions that supports active decay is taken away.
The term “dry rot” can be misleading because the decay does not begin in truly dry wood. The name often refers to the dry, cracked, and brittle look that wood develops after certain types of fungal decay. Moisture was still needed for the damage to start.
Wet rot is another common term. It usually describes decay that remains close to a steady source of moisture, such as a plumbing leak or poor drainage. While the fungi and appearance may differ, the practical response is similar: find the water source, assess the damage, and repair the affected materials.
How to Spot Dry Rot Before It Spreads Through Your Building
Early rot does not always announce itself with a collapsed board or a large patch of fungus. It often leaves small clues first. Property managers, maintenance staff, and board members should pay close attention to changes in areas that are regularly exposed to rain, condensation, or plumbing leaks.
Common warning signs include:
- Wood that feels soft, spongy, or unusually light
- Cracking that forms square or cube-like sections
- Brown, gray, white, or darker patches on the surface
- Paint that bubbles, flakes, or repeatedly fails
- Boards that shrink, warp, or pull away from fasteners
- A damp, earthy, or musty odor
- White, cotton-like growth or thin fungal strands
- Mushroom-like growths or other fruiting bodies
- Rusted fasteners near wet or damaged wood
- Railings, steps, or deck boards that move under light pressure
Do not rely on color alone. Wood may be stained without being rotten, while painted wood can hide decay underneath. Texture, moisture, location, and the condition of nearby materials all help tell the full story.
A basic visual check is useful, but suspected structural damage should be reviewed by a qualified professional. Probing or cutting into wood without knowing what is behind it could damage wiring, pipes, waterproofing, or an already weak structural member.
Where Properties Should Look First
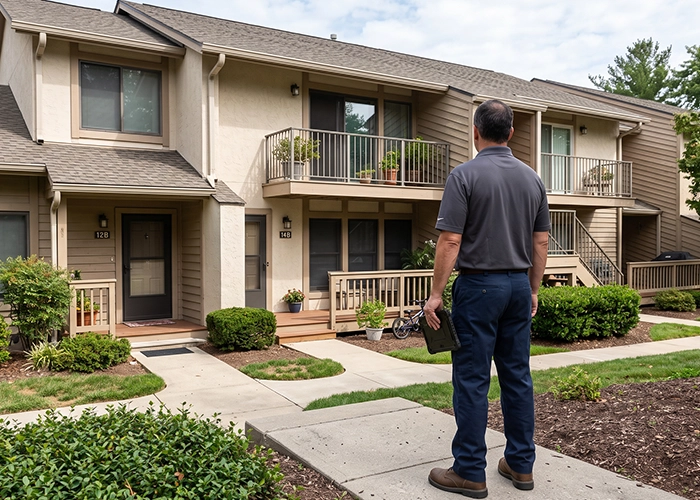
Some parts of a building face more moisture than others. These locations should receive extra attention during routine property walks and seasonal inspections.
Roof Edges and Eaves
Damaged shingles, loose flashing, and clogged gutters can send water into fascia boards, soffits, and roof framing. Stains may appear below the roofline, but decay can also remain hidden behind trim.
Look for peeling paint, sagging sections, open joints, and dark marks near downspouts. Gutters that overflow during rain should be addressed before the repeated wetting damages nearby wood.
Decks, Balconies, and Exterior Stairs
These areas face rain, sunlight, foot traffic, and temperature changes. Water often collects around fasteners, railing posts, board ends, and places where a deck connects to the building.
Pay special attention to ledger boards and structural supports. A deck surface may look acceptable even when the framing beneath it has started to weaken. Movement, loose connections, and soft spots should be treated as reasons for a closer inspection.
Windows and Exterior Doors
Failed caulk, damaged flashing, and poorly sealed trim can allow water to enter around openings. The lower corners of windows and doors are common trouble spots because water can settle there.
Repeated paint failure is often a clue. Repainting may improve the appearance for a short time, but the problem will return if damp or decayed wood remains underneath.
Crawl Spaces and Ground-Level Framing
Poor drainage, plumbing leaks, damp soil, and limited airflow can keep crawl spaces wet. Floor joists, beams, subflooring, and sill plates may then remain exposed to conditions that support decay.
A musty odor, standing water, condensation, or sagging floors can point to a moisture problem. These areas may be difficult to inspect safely, so professional help is often the better choice.
Clubhouses and Other Common Buildings
Clubhouses, pool buildings, mail centers, and maintenance sheds can develop rot around roof penetrations, utility rooms, showers, and exterior trim. These buildings may receive less attention than residential structures, especially during quiet seasons.
Add them to the association’s regular inspection route. A short check several times a year is far less disruptive than closing a shared facility for major repairs.
What Causes Wood Rot
Wood rot rarely comes from a single rainstorm. It tends to develop when wood stays damp or goes through repeated wetting without enough time to dry.
Common causes include:
- Roof leaks. Failed flashing, damaged roofing, and open penetrations can send water into framing and trim.
- Plumbing leaks. A slow leak inside a wall or beneath a floor can keep wood damp for months before a stain appears.
- Clogged or damaged gutters. Overflowing water may soak fascia, siding, window trim, and the area near the foundation.
- Poor site drainage. Water that collects beside a building can reach siding, crawl spaces, posts, and lower framing.
- Failed caulk and sealants. Small gaps around windows, doors, joints, and utility lines can allow rain to enter.
- Weak ventilation. Moist air may become trapped in crawl spaces, attics, bathrooms, or enclosed wall cavities.
- Direct soil contact. Wood posts, siding, or trim placed too close to the ground can absorb moisture and remain damp.
- Sprinkler overspray. Irrigation that repeatedly hits siding, fences, stairs, or columns can create a steady source of water.
Finding the cause is just as important as finding the rot. Replacing a damaged board without stopping the water will usually lead to the same repair later.
What Happens During Inspection

A good inspection starts with the building’s history. The contractor may ask about roof leaks, plumbing repairs, storm damage, drainage trouble, and areas that have been patched before. This context helps narrow the search.
The inspector will then look at visible surfaces, joints, penetrations, flashing, fasteners, and nearby drainage. Moisture meters and other tools may be used to identify damp materials that look normal from the outside.
If hidden decay is suspected, a limited opening may be recommended. The goal is to learn how far the damage extends without removing more material than necessary. When structural framing is involved, an engineer or appropriately licensed contractor may need to evaluate the area.
Photos and a written description of the findings should be requested. Good records make it easier to review repair proposals, explain costs to the board, and update the association’s maintenance history.
How Dry Rot and Wood Rot Repair Is Completed
The exact repair depends on the location, the source of moisture, and the amount of wood that has lost strength. Surface damage and structural decay should not be treated as the same type of project.
A typical repair may include the following steps:
- Stop the moisture source. Roof, flashing, plumbing, drainage, caulk, or ventilation problems are corrected first.
- Expose the affected area. Trim, siding, flooring, or another finish may need to be removed so the full extent of the damage can be seen.
- Remove unsound wood. Wood that has become soft, brittle, or structurally weak is cut out according to the approved repair scope.
- Dry the surrounding materials. Enclosed damp wood should not be covered again before suitable drying has taken place.
- Treat salvageable areas when appropriate. A professional may recommend a wood preservative or repair product for limited, nonstructural damage.
- Install replacement materials. New framing, trim, siding, decking, or other components are fitted and secured.
- Restore weather protection. Flashing, sealants, coatings, and drainage details are completed so water is directed away from the repaired area.
- Document the work. Photos, invoices, warranties, and moisture findings are added to the property’s maintenance records.
Wood fillers and epoxy products may work for small cosmetic repairs when enough sound wood remains. They are not a substitute for replacing a structural member that has lost strength. The repair method should match the actual condition of the wood.
Why Painting over Rot Does Not Work
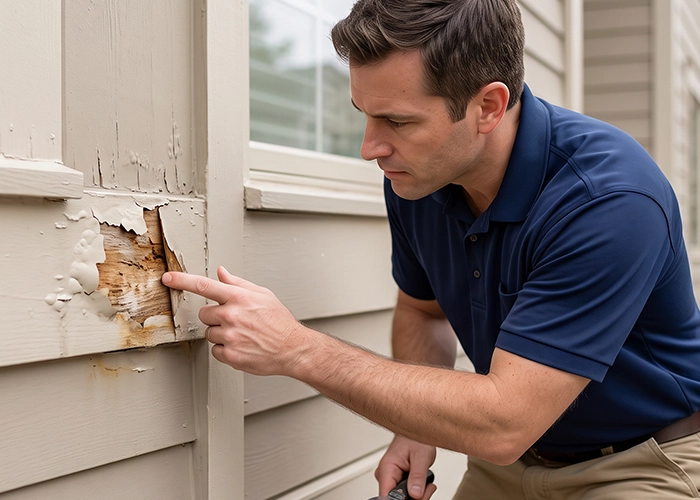
Fresh paint can hide stains and cracks, but it cannot restore strength to decayed wood. If the wood remains damp, covering it may also make it harder for moisture to escape.
The same problem applies to caulking over soft or crumbling material. Sealant needs a stable surface to bond properly. If the base continues to break apart, the joint will open again.
Paint should be the finishing step after the cause and damaged wood have been addressed. When used on a dry, sound, and prepared surface, it becomes part of the building’s moisture protection instead of a temporary cover.
How to Prevent Wood Rot
Prevention begins with keeping water away from vulnerable materials and helping wet areas dry. A practical program does not have to be complicated, but it does need to happen on schedule.
Consider adding these tasks to the association’s maintenance plan:
- Inspect roofs, flashing, siding, decks, and exterior trim at least once a year.
- Check the property after major storms and periods of heavy rain.
- Clean gutters and confirm that downspouts direct water away from buildings.
- Repair plumbing leaks and water stains without delay.
- Keep soil, mulch, and plants from resting against wood siding or trim.
- Adjust sprinklers that spray building surfaces.
- Maintain caulk around windows, doors, joints, and wall penetrations.
- Improve airflow in damp crawl spaces, attics, and utility areas.
- Record repeat trouble spots and review them during budget planning.
- Ask contractors to photograph hidden conditions before closing repairs.
Climate and building design should guide the schedule. A humid or storm-prone community may need more frequent checks than a property in a dry area. Older buildings may also require closer attention around past repairs and original flashing.
Planning and Budgeting for Wood Repairs

Boards are often tempted to budget for visible repair work only. However, the full cost may include access, demolition, moisture correction, carpentry, flashing, painting, permits, and restoration of nearby finishes.
A contingency is useful when damage is hidden. No contractor can confirm the exact condition inside every closed wall before the area is opened. Clear unit pricing or an approval process for added work can help control unexpected costs.
Stay Ahead of Costly Rot and Repairs
Dry rot and wood rot repair is easier to manage when moisture problems are found early and handled at their source.
Regular inspections, accurate records, and timely repairs can help protect your buildings, prevent damage from spreading, and reduce costly repairs down the road.
Small signs of wood decay can lead to bigger problems. Contact Maintenance Specialists Inc. today to address damage early and protect your community’s buildings.
Related Articles:
- Commercial Building Water Damage: Causes, Prevention, And Solutions
- Maintenance Issue Reports: How Communities Should Handle Them
- How Data Improves Facility Maintenance Decisions